The Art of the Single Tooth Correction - Armour Dentistry of Newtown Blog
The Art of the Single Tooth Correction
by Nicole M Armour, DMD –
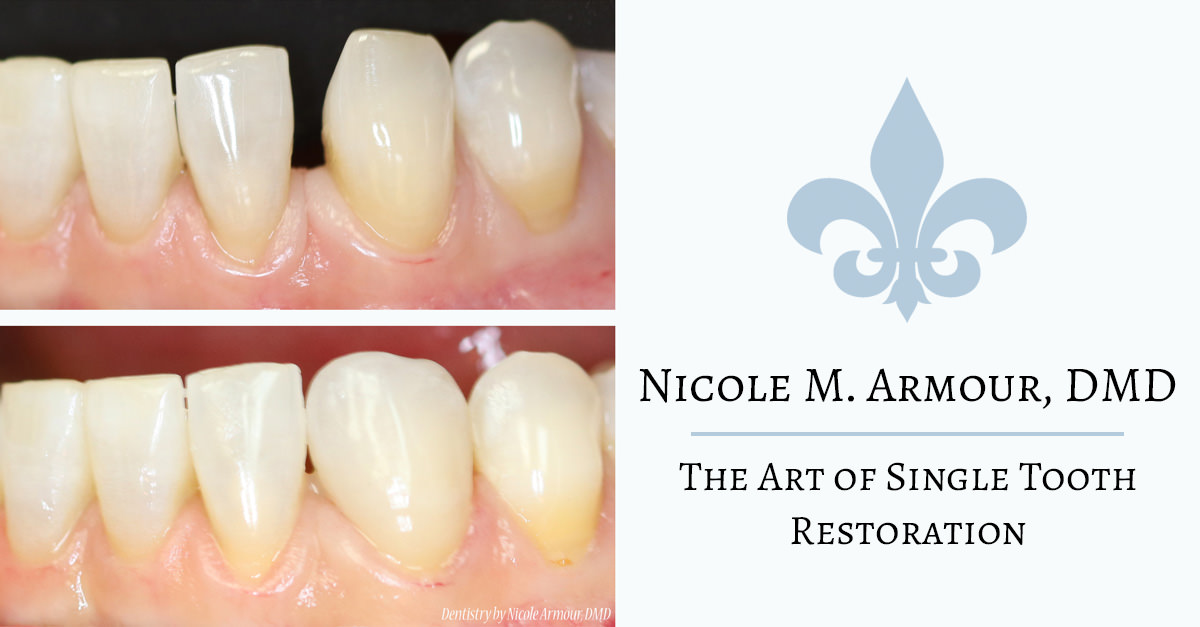
Many dentists would agree that one of the greatest esthetic challenge in dentistry is the restoration of the single anterior tooth. Dental trauma, tooth darkening after internal pulp tissue death, and space closures are the most common reasons for treating a single anterior tooth with a porcelain crown or veneer.
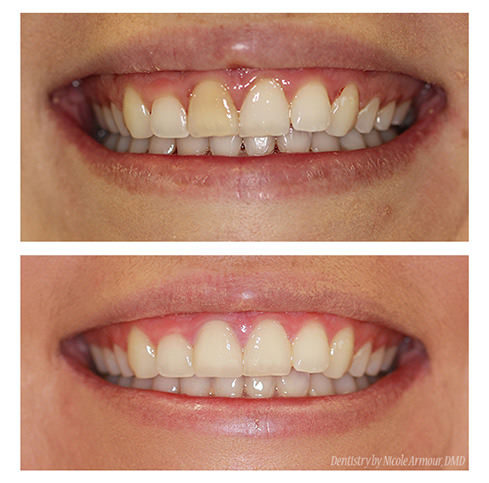
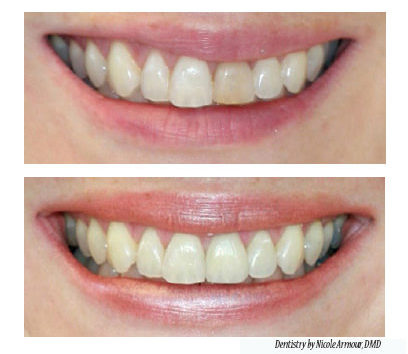
We have all seen the unsightly front tooth of a friend or family member that stands out as obvious dental work. Your front teeth represent you 24/7 and so when selecting a dentist to treat your single anterior tooth, be sure to ask for photographs of their past work so that you can assess the dentist’s attention to detail and selection of quality laboratory technician. A standard practice is to create a crown in two visits with a single picture of a shade tab as a reference for a lab. This, along with insurance pressures to select the cheapest lab, yields less than desirable results. We invest extra time and attention with each of our cases, mostly behind the scenes, in order to deliver the best result for you.
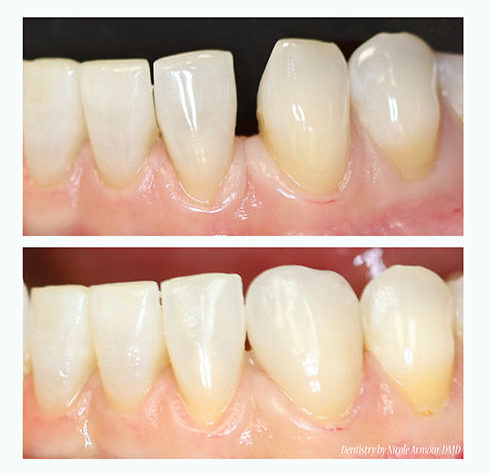
Considerations
In order to capture the intricate details, customized shade, and translucency characteristics of its partner teeth, attention to detail and an established communicative relationship with a premium laboratory technician/artist is imperative to achieve optimal results with a porcelain restoration. There are typically limitations to a “perfect” mirror image result, like working with space that is asymmetrical in size from the start. The only way to assure a perfect match with a central anterior tooth is to also treat the neighboring central tooth at the same time. However, this blog post will detail how we can best work to treat only one tooth for an optimal result given these limitations.
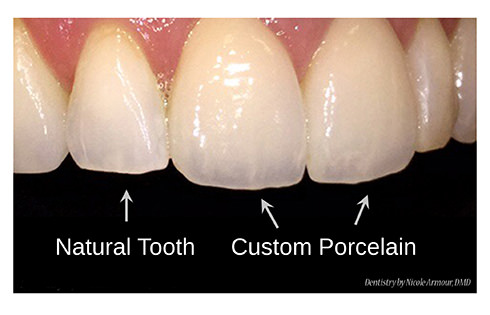
Photography
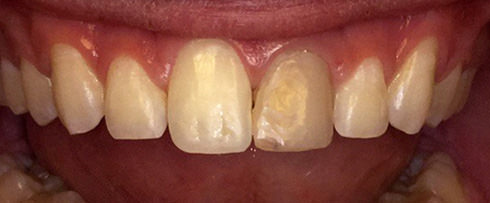
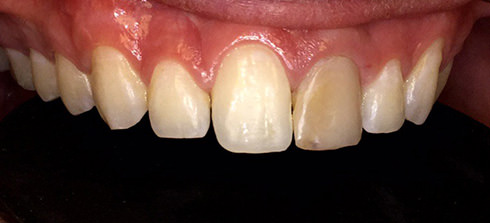
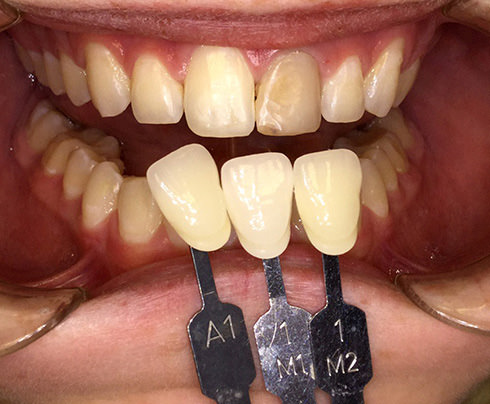
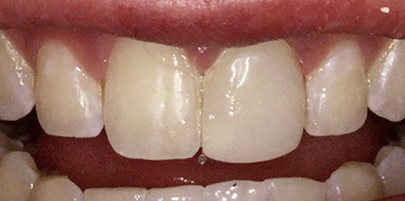
Communication between dentist and laboratory technician includes sharing several photographs: 1) pre-treatment untreated tooth, 2) tooth in front of a black blockout background to capture extent of translucency and specific characterization of the teeth (cracks, spots, surface texture), 3) multiple standardized shade tabs that best match the tooth and 4) standardized preparation shade tabs that capture the shade of underlying prepared tooth. The laboratory technician compiles this information, along the model of the prepared tooth and begins the process of custom shading and layering porcelain.
Series of photos taken for the lab:
We used Smile Line by STYLEItaliano to capture these images rather than our DSLR Cannon
Try-In
In many cases, the lab returns the crown or veneer in an unfinished matte state (“bisque bake”) to verify shade selection and general shape. Photographs are taken of the unfinished restoration placed on the tooth and then returned so that the lab can complete the final steps of processing. Veneers may be able to bypass this step as they intentionally allow for the underlying natural tooth shade to shine through which decreases the need to create masking layers or big changes to shade. The dentist will discuss with you whether your desired outcome will be better achieved by a crown or a veneer.
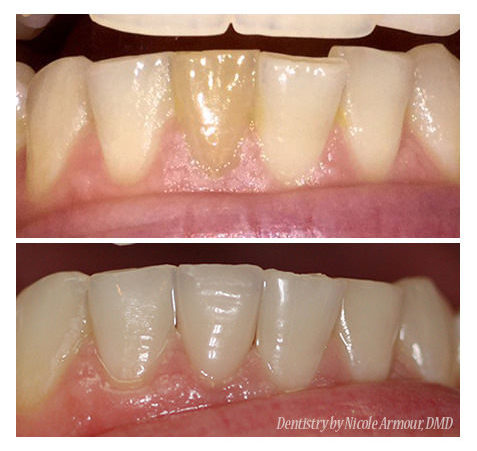
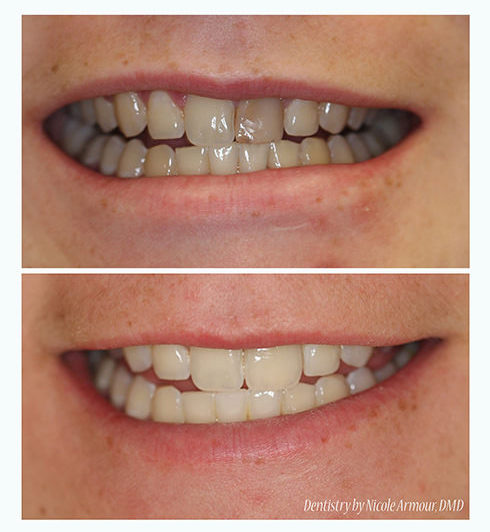
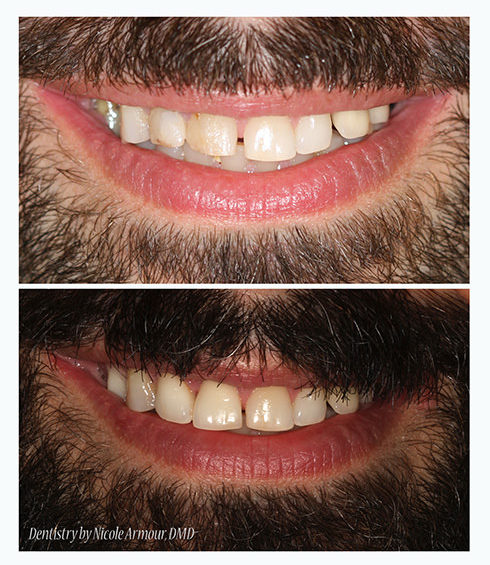
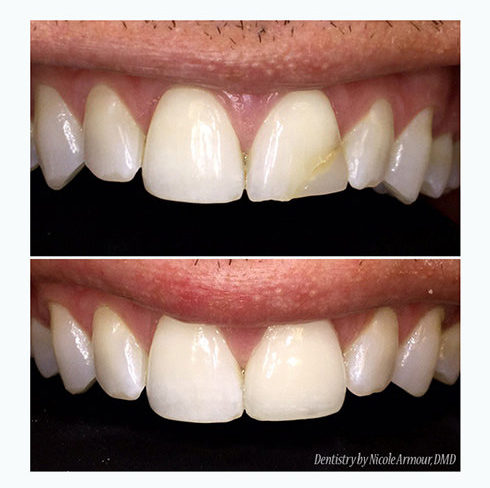
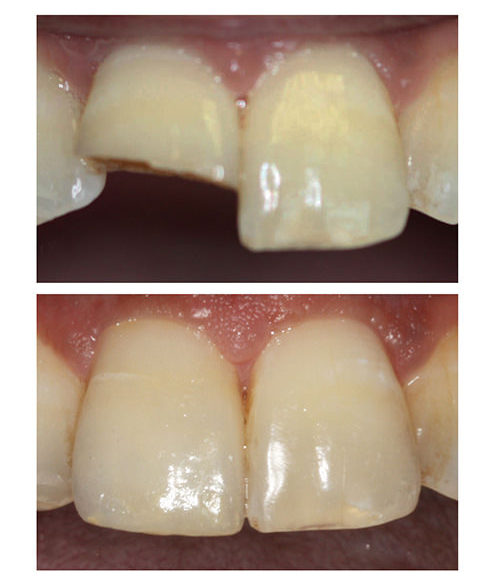
Examples of broken tooth repair:
Final Delivery
Once the final crown or veneer arrives, it is tried on and evaluated for fit and perfect marginal seal. Both doctor and patient must agree with the result before permanently cementing/bonding the restoration into place.
215-860-4141
Upcoming blog posts will focus on Interesting Veneer Cases, Implant Supported Teeth, Full Mouth Reconstruction, Bonding and more…
Nicole M Armour, DMD
12 Penns Trail Suite B
Newtown, PA 18940
215-860-4141
